
If you’re building one report for many customers, teams, or regions, row level security power bi stops a simple dashboard project from turning into a data exposure problem. Done right, it lets you keep one semantic model and one report, while each person only sees the rows meant for that account, territory, or department.
Why row level security in Power BI matters before you publish anything
A shared report without security is like handing out hotel room keys that all open every door. It works, technically. It also creates a mess fast.
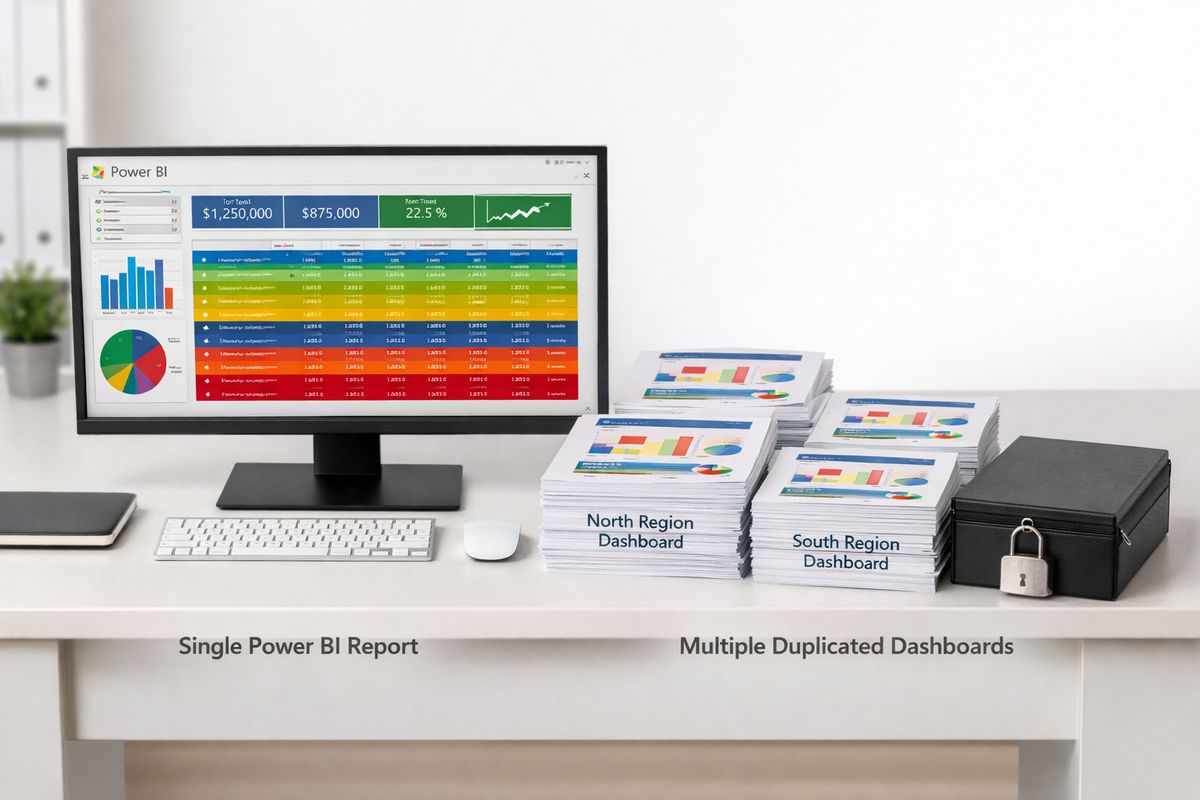
Row-level security, usually shortened to RLS, fixes that by filtering data at the row level based on who is viewing the report. Instead of cloning a dashboard for Customer A, Customer B, West Region, East Region, and every internal team in between, you reuse the same semantic model and report. Power BI evaluates a role filter, keeps the rows that return TRUE, and hides the rest.
That matters for two reasons. First, it reduces reporting sprawl. Second, it gives you a real security boundary inside the model, not a cosmetic workaround like hiding pages or telling people to use the right slicer. If you’re shipping customer-facing analytics, consolidating BI tools into one portal, or trying to avoid a forest of nearly identical reports, RLS is one of the cleanest ways to do it.
What you’ll need before you start
Before touching role logic, get a few basics in place so setup doesn’t turn into guesswork.
You need a Power BI Desktop file with a model that already works, a published semantic model or report, permission to publish into Power BI Service, and a clear mapping of users to the data they should see. That mapping can be simple, like one region per user, or more complex, like one email address linked to several customer accounts.
RLS works with imported models, DirectQuery models, and Direct Lake models in Fabric. If you’re using a live connection to Analysis Services, the security logic belongs in the source model instead of Power BI.
A practical note: this setup is often part of a larger portal decision. If you’re comparing how much of the delivery layer to build yourself, it helps to understand the bigger picture around launching embedded reporting in a SaaS product, because RLS solves data access, not branding, navigation, or tenant provisioning on its own.
Know your access limits before you test
Here’s the catch that trips people up constantly: in Power BI Service, RLS applies to users with Viewer permissions, not Admins, Members, or Contributors. Microsoft is very explicit about Viewer-only enforcement. If you test with an elevated workspace role, you can think your security is broken when the real issue is that your test account bypasses the restriction.
So before you test anything, make sure the person or account you’re using is actually in a Viewer context.
Gather the fields that will drive security
Pick the field or table that will decide access. Good candidates are CustomerID, Region, AccountOwnerID, BusinessUnit, or Email/UPN. Bad candidates are free-text names, inconsistent labels, or anything users manually type into source systems.
If your source has both CustomerName and CustomerID, use the ID. If your user identity is email-based, normalize casing and formatting before building security on top of it. RLS logic built on messy columns tends to work just well enough in testing to make production failures extra annoying.
Step 1: Choose between static and dynamic RLS
Start by deciding how the security rule should behave over time.
- Use static RLS if access can be described with a small set of fixed roles.
- Use dynamic RLS if access should change based on the signed-in user.
- Default to dynamic RLS when you expect customer lists, org structures, or account ownership to change.
Static RLS means you create separate roles such as WestRegion, EastRegion, or Customer42 and define fixed filters for each. Dynamic RLS means one role reads the current login identity and filters the model accordingly. In practice, dynamic RLS is the most common approach because it scales far better.
When static RLS is enough
Static RLS is perfectly fine when the number of slices is small and stable.
- Create a fixed role for each audience segment.
- Assign users or groups to those roles in the service.
- Republish only when the logic itself changes.
This works well for internal pilots, a small executive dashboard, or a handful of regional team views. If you have four sales regions and that structure rarely changes, static roles are fast to ship. The problem starts when one person needs access to three regions, or when new customers appear every week. Then the role list starts to look like a junk drawer.
When dynamic RLS is the better fit
Dynamic RLS is the better fit for customer-facing analytics, partner portals, agencies managing many client accounts, and broad internal rollouts.
- Create one security mapping table that links identities to allowed entities.
- Create one role that filters the mapping table for the signed-in user.
- Let relationships push that filter into the rest of the model.
The two functions you’ll see most often are USERPRINCIPALNAME() and USERNAME(). In plain English, those functions return the current user’s identity string. Your role compares that value to a column in your model, usually an email or UPN, and then filters to the rows that match.
Step 2: Check your model design before adding any role logic
A lot of RLS problems are really model problems wearing a fake mustache.
Before creating roles, make sure your model has clean relationships, sensible dimensions, and a security path that can actually reach the tables used in visuals. RLS tends to behave best in a star schema, where dimensions filter facts in a predictable way. If access logic lives in random columns scattered across fact tables, you’re making the job harder than it needs to be.
Power BI security is much easier to reason about when the filter starts in one place and flows through active relationships. This is also where teams start seeing the connection to serving multiple tenants from one analytics setup, because the model has to be designed for shared use from the beginning.
Confirm the security filter path
Check how the secured table connects to the data shown in reports.
- Identify the table that contains the security rule.
- Trace the relationship path from that table to every fact table used in visuals.
- Confirm the relationships are active and filter in the direction you expect.
If there is no valid path, users can see no data at all, or the filter can stop short and leave unrelated tables wide open. A quick model diagram review often catches this before you waste an hour staring at DAX.
Use a dedicated security mapping table when needed
For dynamic RLS, a dedicated bridge table is often the cleanest option.
- Create a table with one row per user-to-entity permission.
- Include a login field such as Email or UPN.
- Include the entity key such as CustomerID, RegionID, or BusinessUnitID.
- Relate that table to the corresponding dimension.
- Keep it separate from the main fact table.
This pattern is much easier to maintain than stuffing user emails into transaction data. It also lets one person map to multiple accounts without weird workarounds.
Watch for bi-directional relationship side effects
Bi-directional filtering can help in some security designs, but it can also create ugly surprises.
- Use single-direction relationships by default.
- Turn on bi-directional security filtering only when the model truly requires it.
- Test performance and result accuracy before publishing broadly.
Microsoft warns that bi-directional security filtering can hurt performance, especially in larger models. So treat it like hot sauce, a little can help, too much ruins dinner.

Step 3: Create a role in Power BI Desktop
Once the model is ready, define the role in Desktop. This is where role logic lives. User assignment happens later in Power BI Service.
- Open your PBIX file in Power BI Desktop.
- Go to the Modeling ribbon.
- Select Manage roles.
- Create a new role.
- Add a filter expression to the appropriate table.
Power BI expects the filter expression to return TRUE for rows the user should be allowed to see.
Open Manage Roles and name your role clearly
Name the role in a way that still makes sense six months from now.
- Open Manage roles.
- Click Create.
- Enter a descriptive role name such as
CustomerAccessDynamicorRegionalSalesRLS. - Avoid generic names like
Role1orTestRole.
Clear names save time when multiple teams touch the same model or when you need to explain the setup during an audit or incident review.
Pick the table that should carry the filter
Apply the filter where it belongs, not wherever you happen to be clicking.
- Choose the dimension or mapping table that controls access.
- Avoid filtering raw fact tables unless there’s no better option.
- Prefer keys and normalized identity columns over labels or display names.
In most models, filtering a dimension or security table is cleaner and faster than filtering the fact table directly.
Step 4: Add a static RLS rule
Static RLS is the easiest way to understand the mechanics, because the filter is just a fixed condition.
- In Manage roles, select the right table.
- Enter a DAX expression for the allowed rows.
- Save the role.
- Review the logic before testing.
Example: Restrict by region or customer
A simple static rule might look like [Region] = "West" or [CustomerID] = 42.
In plain English, that means only rows matching West, or customer 42, remain visible when that role is active. Everything else disappears from the model context. Visuals, totals, and slicers then recalculate based on the remaining rows.
Save and review the role logic
Tiny mistakes matter here.
- Check spelling and capitalization against the actual column values.
- Confirm data types match the expression.
- Make sure the column belongs to the table you intended to secure.
- Save the role.
A stray space, wrong case, or mismatched number-versus-text comparison can blank out an entire report.
Step 5: Add a dynamic RLS rule
Dynamic RLS is where most real-world setups land, especially when access changes often.
- Build or confirm your security mapping table.
- Create one role for dynamic filtering.
- Filter the user identity column with a DAX function that returns the current login.
- Rely on relationships to push that filter into the relevant dimensions and facts.
The nice part is that access updates often happen in the data, not in the PBIX file. Add a new row to the mapping table, refresh the model, and the new permission takes effect without creating another role.
Use USERPRINCIPALNAME() for most service scenarios
For most Power BI Service scenarios, USERPRINCIPALNAME() is the safer default.
- Store user identity in an Email or UPN column.
- Use
USERPRINCIPALNAME()in the role filter. - Match the returned value to the identity column in your security table.
This function usually aligns with the signed-in email-style identity in the service, which makes it a natural fit for B2B SaaS analytics and internal Entra-based access patterns.
Understand how USERNAME() behaves in Desktop vs Service
USERNAME() is where a lot of confusion starts.
- Remember that Desktop often returns
DOMAIN\username. - Remember that Service often returns a UPN-style value.
- Avoid assuming the same format in both places.
- Test after publish.
If you build your rule on one format and your model stores the other, the role can look correct on your laptop and fail immediately in the service.
Example pattern for a user-to-customer mapping table
The common pattern is simple.
- Create a table with columns like
UserEmailandCustomerID. - Relate
CustomerIDto your customer dimension. - Create a role filter on the security table where
UserEmailequals the current identity. - Let the relationship filter the allowed customers.
That one role can serve one customer, ten customers, or a rotating set of accounts per user. If you’re also comparing portal approaches, this is one of the security pieces that matters when evaluating what a white-labeled analytics layer should actually handle.
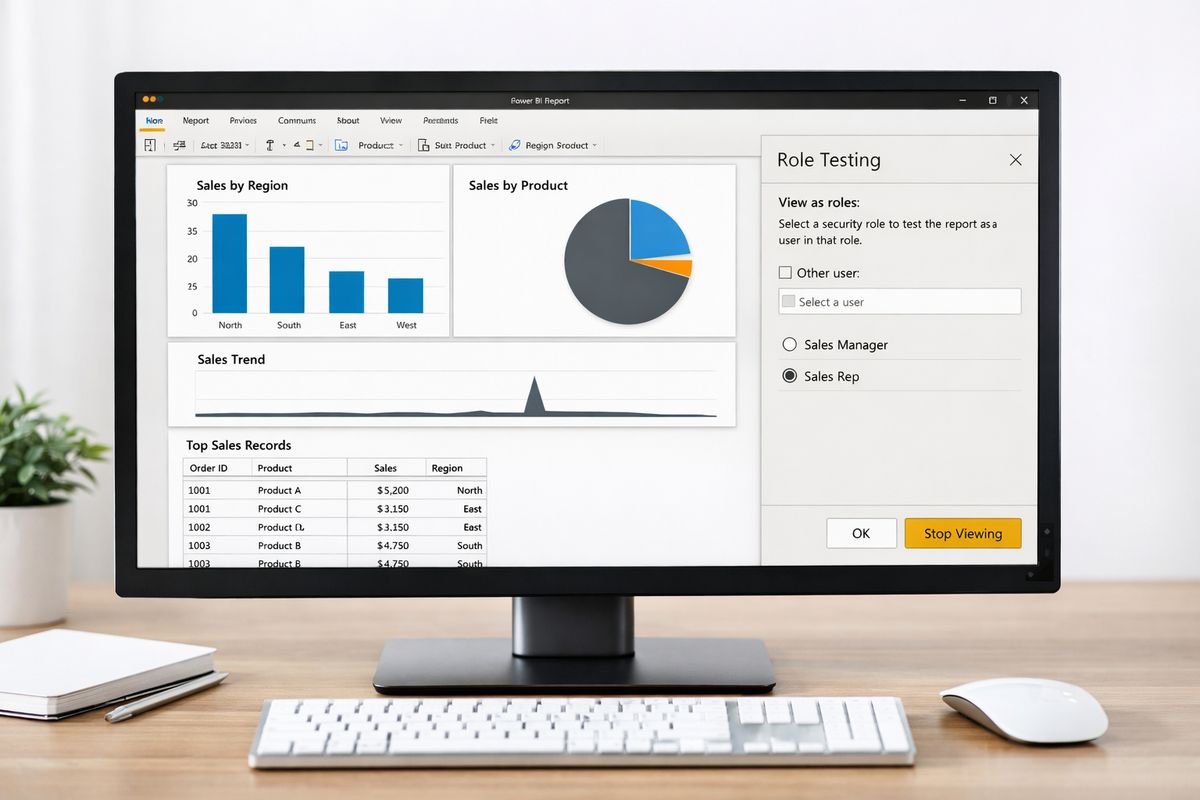
Step 6: Test the role in Power BI Desktop
Never publish RLS you haven’t tested. Ever.
- Open the report in Desktop.
- Go to the Modeling ribbon.
- Select View as.
- Choose the role you want to simulate.
- Review visuals, totals, filters, and drill paths.
This is your first sanity check, not your final sign-off.
Use View as to simulate each role
Use View as to confirm the report behaves as expected.
- Test every role you created.
- Compare what should be visible versus what is actually visible.
- Check not just tables, but also cards, KPIs, and drill-through pages.
Power BI Desktop supports View As testing, and it’s the fastest way to catch obvious logic errors before publishing.
Check edge cases like users with multiple accounts
The obvious case is rarely the one that breaks.
- Test a user mapped to several customers.
- Test a user with overlapping access, such as two regions.
- Test a user with no matching row in the mapping table.
- Confirm the no-match case returns no rows, not all rows.
That last check matters a lot in embedded scenarios, especially if application logic can pass identity values into the model.
Validate totals and measures, not just rows
Rows can look right while measures are quietly doing something broader.
- Review measures used in summary cards and executive totals.
- Check for functions like
ALL(),ALLEXCEPT(), orREMOVEFILTERS(). - Compare totals under View as with manual expectations.
Copied DAX and AI-generated DAX deserve extra suspicion here. A measure can technically respect the model while still removing context in a way that defeats what you expected to see.
Step 7: Publish the semantic model and report to Power BI Service
Once Desktop testing looks good, publish the model and report.
- Save the PBIX file.
- Publish to the intended workspace.
- Wait for the semantic model and report to appear in Power BI Service.
- Move to the service for user assignment and validation.
The role definitions go with the model when you publish. The user membership does not.
Publish to the right workspace
Choose the workspace carefully.
- Publish to the environment that matches your deployment flow.
- Keep dev, test, and production separate if your process allows it.
- Remember that workspace access affects how RLS is enforced.
This is not just housekeeping. If someone is a Member instead of a Viewer, RLS won’t apply in the way you expect. That becomes even more relevant when you’re pricing out delivery models and access patterns around what Power BI embedded access really costs in practice.
Confirm the semantic model includes the role
After publishing, verify the role made the trip.
- Open the workspace in Power BI Service.
- Find the semantic model.
- Open its security settings.
- Confirm the role names are present.
This quick check saves a lot of backtracking if you accidentally published the wrong file or old version.
Step 8: Assign users or groups to roles in Power BI Service
Now connect the role to real users.
- Open the semantic model in Power BI Service.
- Go to Security.
- Select the role.
- Add users or groups.
- Save.
This follows Microsoft’s standard Desktop-to-Service workflow, where role logic is defined in Desktop and membership is managed online.
Add individual users or security groups
Use groups whenever you can.
- Add individual users for small, temporary tests.
- Add Microsoft Entra security groups for repeatable production access.
- Save changes and document who belongs where.
Groups are easier to maintain than one-by-one assignment, especially when employee turnover or customer team changes happen often.
Know when role membership still matters with dynamic RLS
Dynamic RLS still needs the role to activate.
- Give the user access to the report or app.
- Add the user or group to the RLS role if your setup requires that role membership.
- Let the mapping table decide which rows become visible.
This is a common point of confusion. Dynamic logic reduces the number of roles you maintain, but it doesn’t remove the need to connect users to the secured model.
Step 9: Test RLS in Power BI Service with real conditions
Desktop gets you close. Service-side testing gets you the truth.
- Open the semantic model security settings.
- Use role testing features in the service.
- Validate report behavior after publish.
- Repeat with a restricted account.
Use Test as role in the Service
Power BI Service gives you a second validation point.
- Open the role in Security settings.
- Use Test as role.
- Compare the results with what you saw in Desktop.
Be aware of the limits. Microsoft notes that Test as role limits include dynamic RLS using your own identity in certain cases, plus gaps for some DirectQuery SSO and paginated report scenarios.
Test with a restricted account, not just an admin login
This is the test that catches real problems.
- Create or use a true viewer-level test account.
- Sign in as that account.
- Open the report through the same path real users will use.
- Confirm visible rows, measures, and drill paths.
Admin testing is convenient, but it can hide the exact problem you’re trying to detect.
Check embedded or customer-facing scenarios separately
If the report is surfaced through a portal, app, or embedded frame, test that path too.
- Validate identity passing in the actual delivery flow.
- Confirm the user or effective identity reaching the model matches your security table.
- Check customer-specific access in the real tenant context.
For embedded analytics, RLS is only one part of the setup. JWT signing, SSO, effective identity, and tenant routing can all affect what the model sees. If you’re comparing architectures, it helps to understand how embedded BI works beyond the report itself.
Step 10: Handle common advanced scenarios
Basic RLS tutorials often stop too early. Production setups don’t.
External guest users and cross-tenant access
B2B guest access can get messy because identity formats are not always as neat as you want.
- Verify the exact identity string reaching the model.
- Compare it to the value stored in your mapping table.
- Test with real guest accounts, not assumptions.
- Add external users directly when group resolution is unreliable.
Microsoft specifically recommends careful testing for external guest users, because guest UPN behavior can differ from what you expect.
DirectQuery and Direct Lake performance considerations
RLS still works with DirectQuery and Direct Lake, but performance can shift.
- Keep the security path simple.
- Check whether filters fold efficiently in DirectQuery.
- Watch for Direct Lake fallback behaviors.
- Test report speed after enabling RLS, not just before.
If a Direct Lake model falls back to DirectQuery because of unsupported features, the report can suddenly feel much heavier. Users won’t care why it got slower. They’ll just notice.
Object-level and column-level security are different tools
RLS controls rows, not model objects.
- Use RLS to restrict which records are visible.
- Use object-level or column-level security when the issue is access to tables or columns.
- Do not treat hidden pages or hidden fields as security.
That distinction matters. A hidden measure name is not protection. A filtered row set is.
Step 11: Troubleshoot the issues that break RLS most often
When RLS fails, the symptoms are usually obvious. The cause usually isn’t.
No data appears for a user
Start with the basics.
- Check that the user’s identity exactly matches the security table value.
- Confirm the relationship path reaches the visual’s data.
- Look for blanks or mismatched keys.
- Verify the role filter can return TRUE for at least one row.
- Confirm the user is assigned correctly in the service.
Most no-data issues come down to identity mismatch or a broken filter path.
A user sees too much data
Too much access is the scarier failure.
- Check for overly broad filters.
- Review relationships and cross-filter directions.
- Inspect measures for
ALL()or similar context-removal logic. - Confirm the user is not in multiple roles that widen access.
- Make sure the test account is not an Admin, Member, or Contributor.
Also, hidden visuals are not a security boundary. If the model exposes the data, a determined user can often still get to it.
The rule works in Desktop but fails in the Service
This usually points to identity format or assignment.
- Compare
USERNAME()andUSERPRINCIPALNAME()behavior. - Check the exact value returned in the service context.
- Confirm the published model contains the current role.
- Confirm the user or group was assigned after publish.
If the rule only worked on your laptop, assume identity formatting first.
Performance drops after RLS is enabled
Security adds query work, sometimes a lot.
- Compare report timings before and after View as.
- Simplify the security mapping path.
- Move filters to dimensions instead of fact tables where possible.
- Revisit bi-directional relationships.
- Review DirectQuery behavior and source performance.
If the report was already borderline slow, RLS often exposes that weakness immediately.
Step 12: Maintain and scale your RLS setup without creating a mess
The first version of RLS is usually not the hard part. Keeping it tidy is.
Prefer groups and mapping tables over manual user lists
Manual user lists don’t age well.
- Use groups for broad membership changes.
- Use mapping tables for per-user or per-customer logic.
- Keep access updates in data operations where possible, not PBIX edits.
That setup is easier to support when customers onboard, employees move teams, or agencies rotate account ownership.
Document role purpose and test cases
A little documentation goes a long way.
- Record each role name and what it is meant to filter.
- Note which tables carry the security logic.
- Save a few test cases with expected results.
- Update the notes when the model changes.
This can be a plain page in your team wiki. Nothing fancy. Just enough to stop a Monday morning fire drill.
Re-test after model changes, new measures, or Copilot-generated DAX
Security can drift over time.
- Re-test after relationship changes.
- Re-test after new summary measures are added.
- Re-test after AI-generated DAX or Copilot-assisted edits.
- Use a restricted account, not only desktop simulation.
This matters more now because generated DAX sometimes introduces context-removal functions that look harmless until a viewer sees a total that feels suspiciously large.
What success looks like after setup
When RLS is working properly, one report or semantic model serves many audiences without becoming a copy-and-paste nightmare. Each user sees only authorized rows. Customer A does not see Customer B. West Region stays West Region. Internal teams get the slice meant for them, and your reporting estate stays much cleaner.
That is the real win: tighter security and less dashboard sprawl at the same time.
Try this next: start with one dynamic role and one test account
Don’t start by modeling every possible exception. Start small.
Build one security mapping table. Create one dynamic role using your email or UPN field. Publish it, assign one real viewer test account, and validate it in Power BI Service. That one test tells you very quickly whether your model is ready for a wider rollout.
Frequently Asked Questions
Does row-level security apply to workspace admins in Power BI?
No. RLS applies to Viewer access, not Admins, Members, or Contributors in the workspace. If you test with elevated permissions, results can be misleading.
Should you use USERPRINCIPALNAME() or USERNAME() for dynamic RLS?
Usually USERPRINCIPALNAME() is the better default in Power BI Service because it commonly matches an email-style identity. USERNAME() can return different formats in Desktop and Service, which causes a lot of confusion.
Can one user belong to more than one RLS role?
Yes, but be careful. Multiple role assignments are additive, which can lead to broader access than intended. In many cases, a single well-designed dynamic role is safer and easier to manage.
Does RLS secure hidden pages, tables, or columns?
No. RLS only filters rows. If you need to restrict access to specific tables or columns, use object-level or column-level security. Hidden content is not the same as secured content.
Why does RLS work in Desktop but fail after publishing?
The most common reasons are identity format differences, missing role assignment in Power BI Service, or testing with the wrong workspace permissions. Check the exact login value being evaluated in the service.
Is static or dynamic RLS better for customer-facing analytics?
Dynamic RLS is usually better because it scales with customer and user changes. Static RLS is fine for small, stable permission sets, but it becomes painful to maintain as access rules grow.