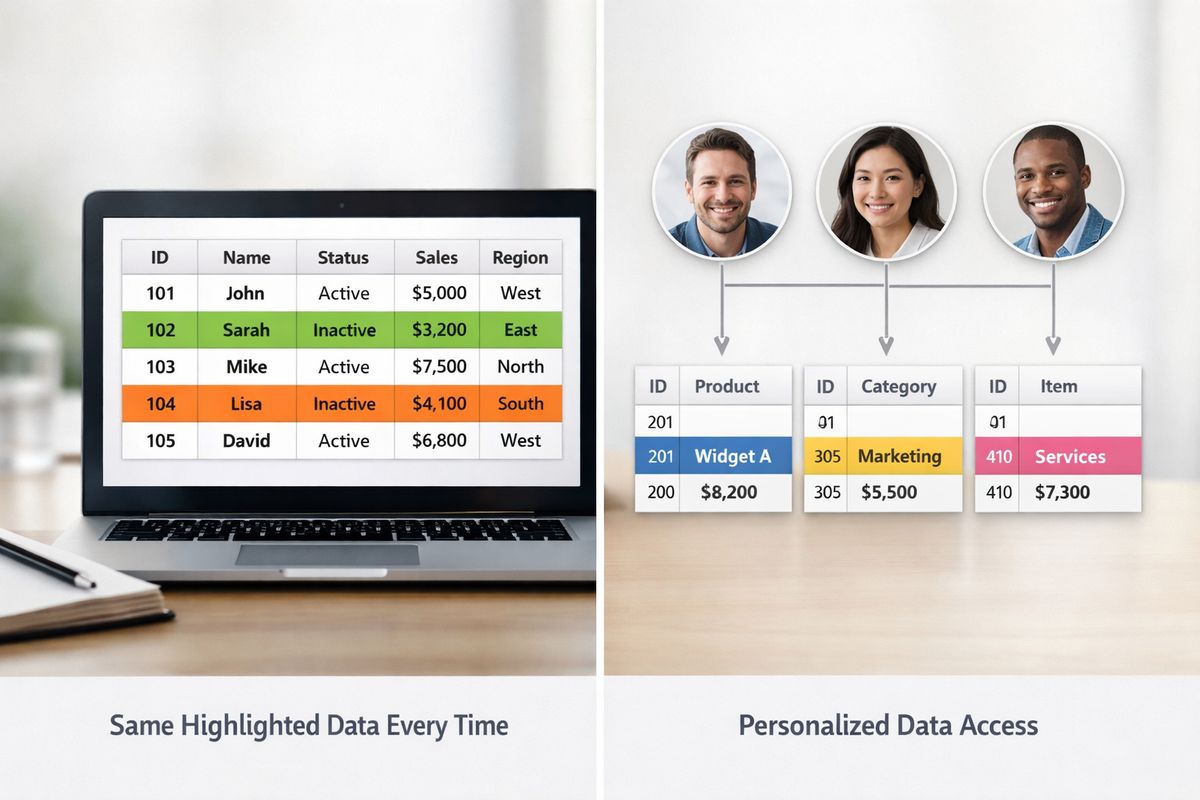
Row level security power bi setups solve a problem that shows up fast once dashboards leave the safety of internal use. You want one report, one semantic model, and different people seeing different rows without rebuilding the whole thing every time a customer, region, or business unit changes.
Prerequisites: What You Need Before You Set Up RLS in Power BI
Before you touch DAX, get the basics in place. You need a Power BI semantic model, a published report, and a clear rule for who should see which rows. You also need access to Power BI Desktop and the Power BI service, plus at least one test account so you can verify the result before real users log in.
The big mistake here is starting with the role editor before you know the access pattern. That usually turns into a mess of half-finished roles and a model that feels like a drawer full of charging cables.
Know which security pattern you’re building
Decide whether you need static RLS or dynamic RLS. Static RLS means access stays mostly fixed, which works when each group sees the same slice of data. Dynamic RLS means access changes based on identity or a lookup table, which is the better fit when users move around, customers come and go, or support teams need one portal with many tenants.
That choice affects everything else. It changes your DAX, your table design, and how much manual cleanup you’ll have later.
Check your data model first
Make sure your tables have a clean path for filtering, usually through a dimension table or a security mapping table. RLS works best when filters flow through simple, predictable relationships. If your model already has tangled many-to-many joins and disconnected tables everywhere, fix that before security enters the picture.
Here’s the thing: RLS is not magic. If the model is messy, the security layer gets messy too.
Confirm your permissions and deployment setup
Verify that you can publish to the service and assign users or groups to roles. If you plan to support customer-facing analytics, external guests, or SSO, line up those identity details now. You do not want to discover later that your portal login, Entra identity, and Power BI user principal name all spell the same person three different ways.
Power BI also treats workspace permissions differently from RLS. In the service, RLS applies to Viewer permissions only; Admins, Members, and Contributors can see more than you want them to.
Step 1: Decide What Rows Each Audience Should See
Start with the business rule, not the DAX. Write the rule in plain language first, like “regional managers see only their region” or “each customer sees only its own account.” If you can explain the rule in one sentence, you are ready to translate it into the model.
Map audiences to security rules
List the audiences that need access. Internal teams, customers, agencies, franchise owners, and executives often need different views, but that does not mean each one deserves a unique custom role. Keep the number of roles as small as you can without weakening the rule.
A good RLS design feels boring in the best possible way. A bad one becomes a role zoo.
Choose the grain of access
Decide whether access should be based on user, team, region, client, business unit, or something else. The trick is to pick a grain that stays stable enough to maintain and specific enough to protect the data. For customer portals, account ID is often cleaner than company name. For internal sales dashboards, region or territory usually works better than a long list of individual usernames.
Identify identity source and user matching
Figure out how Power BI will know who is looking at the report. In many models, that means using USERNAME() or USERPRINCIPALNAME(). If you are embedding analytics, CUSTOMDATA() can also show up in the mix.
One detail trips people up all the time: USERNAME() behaves differently in Desktop and the service. In Desktop, it often returns DOMAIN\username, while in the service it returns a UPN. Microsoft documents this difference clearly, and it matters a lot when a rule works locally but fails after publish.
Step 2: Build the Security Table or Mapping Table
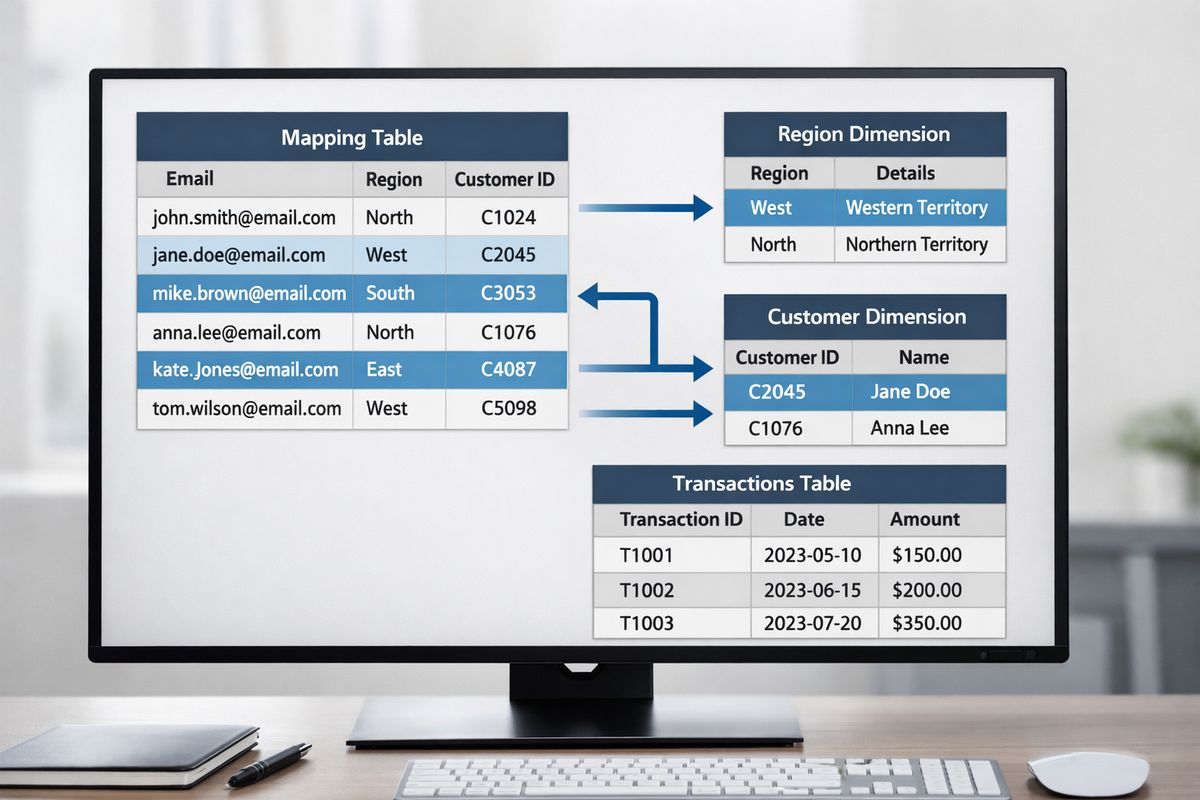
Create a table that links users or groups to the rows they can access. This is the cleanest way to scale dynamic RLS, and it keeps access logic out of the fact table where it does not belong. You can think of it like a guest list at a venue, except the wrong name means somebody sees payroll data instead of a blank page.
Create a user-to-entity mapping
Add fields like email, UPN, region, customer ID, account ID, or employee ID, depending on the model. Keep the table explicit and tidy so you can debug it later without guessing what each column does. If one person needs access to multiple locations, give that person multiple rows in the mapping table instead of trying to hack the rule into a single value.
That structure is what makes dynamic RLS worth the trouble. You update a table, not a PBIX file.
Keep the mapping table separate from fact data
Store security logic in its own table instead of burying it inside the transaction table. That separation makes the model easier to understand and reduces the risk of accidental exposure. It also helps if a customer, region, or internal team changes next quarter, because security updates stay isolated from reporting logic.
Validate relationship paths
Check that the mapping table can filter the right dimension or fact table through direct relationships or a clearly defined bridge. A simple path is usually the right path. If you have to explain the filter flow with a whiteboard and a coffee, it is probably too clever.
Step 3: Define RLS Roles in Power BI Desktop
Open your semantic model in Power BI Desktop and create the roles that will enforce row filtering. This is where business rules become actual security rules.
Create a role for each access pattern
Add roles such as “Sales Region,” “Customer Viewer,” or “Internal Admin.” Keep role names simple, and remember that role names cannot contain commas. That sounds minor until you try to publish and find out the hard way.
Microsoft’s documented flow is simple: define roles and DAX rules in Power BI Desktop, publish the model and report, then manage membership in the service.
Write the DAX filter expression
Add the filter that limits rows for each role. Static RLS usually uses a direct value, such as a region name or country. Dynamic RLS uses identity-driven logic, often by comparing the signed-in user to a lookup table.
A simple static filter might look like [Country] = "Canada". That works fine when the access rule is fixed. When the rule changes by user, move to a mapping-table approach instead of hard-coding exceptions.
Use identity functions for dynamic RLS
Build dynamic rules with USERNAME() or USERPRINCIPALNAME() when access should follow the signed-in person. This is the common pattern for customer portals and shared reporting hubs because one role can serve many users.
The catch is that the identity value has to match exactly. One extra space, old alias, or mismatched domain can make the whole thing look broken even when the DAX is fine.
Step 4: Connect the Security Table to Your Model
Wire the security table into the rest of the semantic model so the filters flow where you expect. A clean relationship design is what makes RLS feel reliable instead of mysterious.
Link the security table to the right dimension
Connect the mapping table to a dimension like customer, region, or employee rather than to every fact table directly. That keeps the model easier to maintain and usually makes filtering more predictable. In many models, the dimension table acts like the gatekeeper, and the fact table simply follows along.
Avoid overcomplicated filter paths
Use simple relationships and avoid circular logic where possible. By default, RLS uses single-direction filtering even if the model relationships are bi-directional, though Power BI does let you enable security filtering in both directions. Microsoft warns that bi-directional security filtering can hurt performance, especially in large models or ones with lots of relationships (Microsoft documentation).
Check for performance side effects
Pay attention to DirectQuery and Direct Lake behavior, especially if query fallback is possible. RLS still applies in those cases, but slow relationships or fallback behavior can make the report feel sticky. For Fabric Direct Lake, RLS can also force a fallback to DirectQuery in some setups, which may slow things down more than you expect.
Step 5: Test the Role in Power BI Desktop
Before you publish anything, verify that your rules behave the way you expect inside Desktop. This catches mistakes while fixing them is still cheap.
Use View as role
Open the report and simulate each role so you can see exactly what data survives the filter. Power BI Desktop includes a built-in validation step called “View as,” which is the fastest way to catch a bad rule before it leaves your machine.
Think of it like tasting soup before it goes on the table. Small step. Big difference.
Test static and dynamic paths separately
Check whether fixed rules and identity-based rules both return the right rows. Dynamic RLS often fails for boring reasons, like an email mismatch or a user table that still has last quarter’s values. The logic may be correct while the input data is stale.
Watch for Desktop versus service differences
Remember that USERNAME() can return DOMAIN\username in Desktop but a UPN in the service. If your rule passes locally and fails online, that mismatch is often the reason. Test both environments before you assume the DAX is wrong.
Step 6: Publish to Power BI Service and Assign Users
Move the model to the service once the Desktop version behaves correctly. This is where role membership gets applied and where real access control starts to matter.
Publish the semantic model and report
Push the tested version to the Power BI service so your RLS rules live where users will actually consume them. Keep the published version aligned with the file you just validated, because drift between files is how security bugs sneak in.
Add users or security groups to roles
Assign people or supported groups to each role in the service rather than managing access one name at a time whenever possible. The service supports Distribution Groups, Mail-enabled Groups, and Microsoft Entra Security Groups, but not Microsoft 365 groups for RLS membership (Microsoft documentation).
For growing teams, groups are the sanest choice. Manual assignment works right up until it becomes a part-time job.
Confirm Viewer-only access behavior
RLS in the service applies only to Viewer permissions. Admins, Members, and Contributors can see all data and edit security rules regardless of your role setup. That is not a footnote, that is the rule that determines whether your setup is actually secure.
Step 7: Validate Access in the Service
Use the service-side tools to confirm that published roles work as intended. This is the point where you check the real environment, not just a Desktop simulation.
Use Test as role
Run the built-in test to impersonate a role and confirm the right rows appear. Power BI service admins can use “Test as role” from the role menu to view the report as that role. It is a very handy checkpoint, but it does not cover every situation.
Test with real identities
Try the setup with a real user, a group member, and, if needed, an external guest. Microsoft notes that Test as role has limits with B2B guest identities and does not fully validate some DirectQuery with SSO scenarios, so a real login test matters more than the button makes it seem (Microsoft documentation).
Check downstream items too
Open the report, dashboards, and any dependent content to make sure the filter carries through. RLS should protect the whole experience, not just one visual on one page. If a user can drill into something sensitive through a back door, the setup is not done yet.
Step 8: Set Up RLS for External Users, Guests, or Embedded Analytics
If you are serving customers or clients, your security setup needs to work across tenant boundaries and embedded sessions. This is where identity details and token claims start pulling their weight.
Handle B2B guest users carefully
Map guest identities correctly and verify what Power BI sees as the user principal name. Microsoft recommends adding external B2B guests directly to RLS roles by email address if Entra security groups do not resolve cleanly. For larger external populations, dynamic RLS with USERPRINCIPALNAME() is usually the better move.
Use SSO or JWT claims when embedding
If you are embedding Power BI for customer-facing analytics, make sure the signed token carries the right identity context. JWT signing and SSO help your app pass trust to Power BI without building the embedding layer from scratch. That matters when you are trying to ship a branded portal without inventing a second security system just for reports.
Avoid assuming portal login equals report access
Your portal may know who the user is, but Power BI still needs a clean identity mapping to enforce RLS. The trick is to make both sides agree on who the user is and what that person can see. If the portal says one thing and the semantic model says another, users get blanks or, worse, the wrong data.
Troubleshooting: Common RLS Problems and How to Fix Them
When RLS breaks, it usually breaks in predictable ways. Most issues come from identity mismatches, weak relationships, or workspace permissions that override what you expected.
Users see blank reports
Check whether the user is mapped to any row in the security table and whether the USERNAME() or USERPRINCIPALNAME() value matches exactly. A missing dot, extra space, or old email alias can block everything.
Users see too much data
Review workspace role membership first, because higher-permission users can bypass the practical effect of RLS in the service. Then check for relationship paths that let filters slip past the intended table.
Dynamic RLS works in Desktop but not in the service
Compare the identity function output in both environments and verify the published model matches the tested file. If the service sees a UPN and Desktop sees a domain-style login, your rule may need a small swap.
Direct Lake or DirectQuery feels slow
Look at query fallback, table size, and relationship complexity. RLS is not free, and in large models a clunky security path can turn a fast report into a coffee-break experience.
External guests get no data
Confirm tenant configuration, guest identity resolution, and role assignment method. Guest scenarios often fail because the mapping table expects one identity format while the service sends another.
Step 9: Decide When Static RLS, Dynamic RLS, or Another Control Fits Best
Not every situation needs the same setup, and picking the wrong pattern costs time later. A simple rule beats a clever one if your access model barely changes.
Use static RLS when access is stable
Choose static roles when your audience list barely moves and the number of groups stays small. It is straightforward, but it gets annoying fast if you keep swapping names every week. Static RLS works, but it is not the format you want for a customer portal with frequent onboarding.
Use dynamic RLS when access changes often
Pick dynamic RLS when users move between territories, clients, or business units. It is the stronger choice for customer-facing analytics portals and shared reporting hubs because you can update a mapping table instead of republishing the model every time access changes.
Know when to combine RLS with other controls
Pair RLS with object-level security, workspace permissions, or broader governance rules when you need more than row filtering. Power BI and Fabric support more than one layer of control, and that is often the right answer when sensitive data lives next to normal reporting data. The point is not to make security fancy, it is to make it reliable.
Expected Outcome: What a Working RLS Setup Looks Like
When everything is wired correctly, each person opens the same report and sees a different slice of the data without noticing the complexity behind it. Your model stays centralized, your security stays predictable, and your team avoids cloning reports for every audience.
Confirm the experience for end users
A customer, manager, or partner should land on one branded portal and only see the rows they are allowed to see. That is the whole point, one report, many views, no security drama. If the experience feels seamless, the setup is doing its job.
Plan your next cleanup pass
After the first rollout, tighten role names, document the mapping table, and revisit performance hotspots. If you want a cleaner embedded experience without rebuilding the plumbing, try embedportal.com and see how much faster customer-facing analytics gets when the portal layer is already handled.

Curious how this would work on your own data?