If you’re setting up customer-facing dashboards, row level security Tableau work can feel simple right up until the moment one client sees another client’s data. That is the whole game here: one dashboard, many users, zero leaks. This walkthrough shows how to set it up in a way you can actually maintain.
Use
Use Use
Use 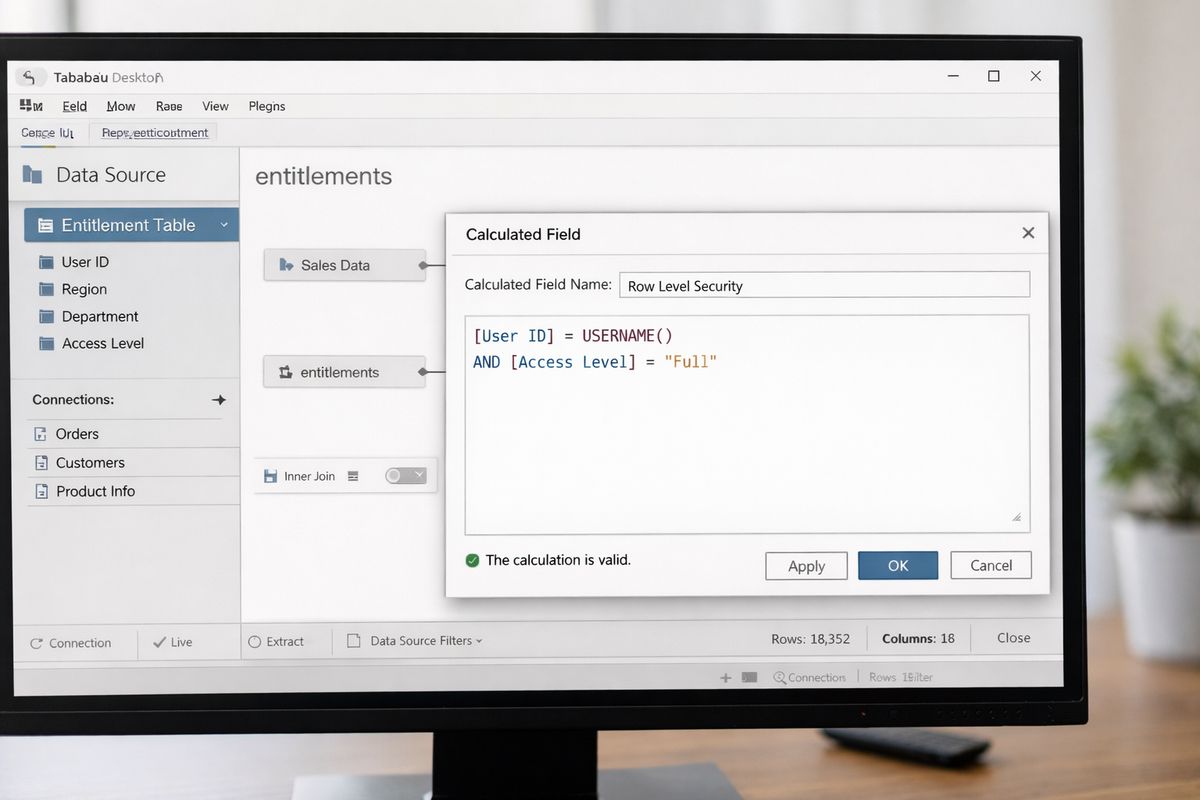
What row-level security in Tableau actually does
Row-level security means each signed-in user only sees the records tied to that user, account, region, or role. In practice, that usually means one workbook or one published data source serves many audiences, but the underlying rows change based on identity. That sounds small. It isn’t. In a client portal at 9:12 a.m., one bad filter is not a cosmetic issue. It is a trust issue, a support issue, and sometimes a contract issue.What you’ll need before you start
Before touching a calculation, get the setup right. You need Tableau Cloud or Server access, a workbook or published source, a stable way to identify users, and an entitlement model that maps users or groups to allowed records.Decide which identity field Tableau should trust
Pick one identity field and stick to it: username, email, SAML attribute, OIDC attribute, or group name. The trick is consistency. If your warehouse saysacme_admin@company.com but Tableau says acme-admin, your security logic gets brittle fast.
Prepare an entitlements table
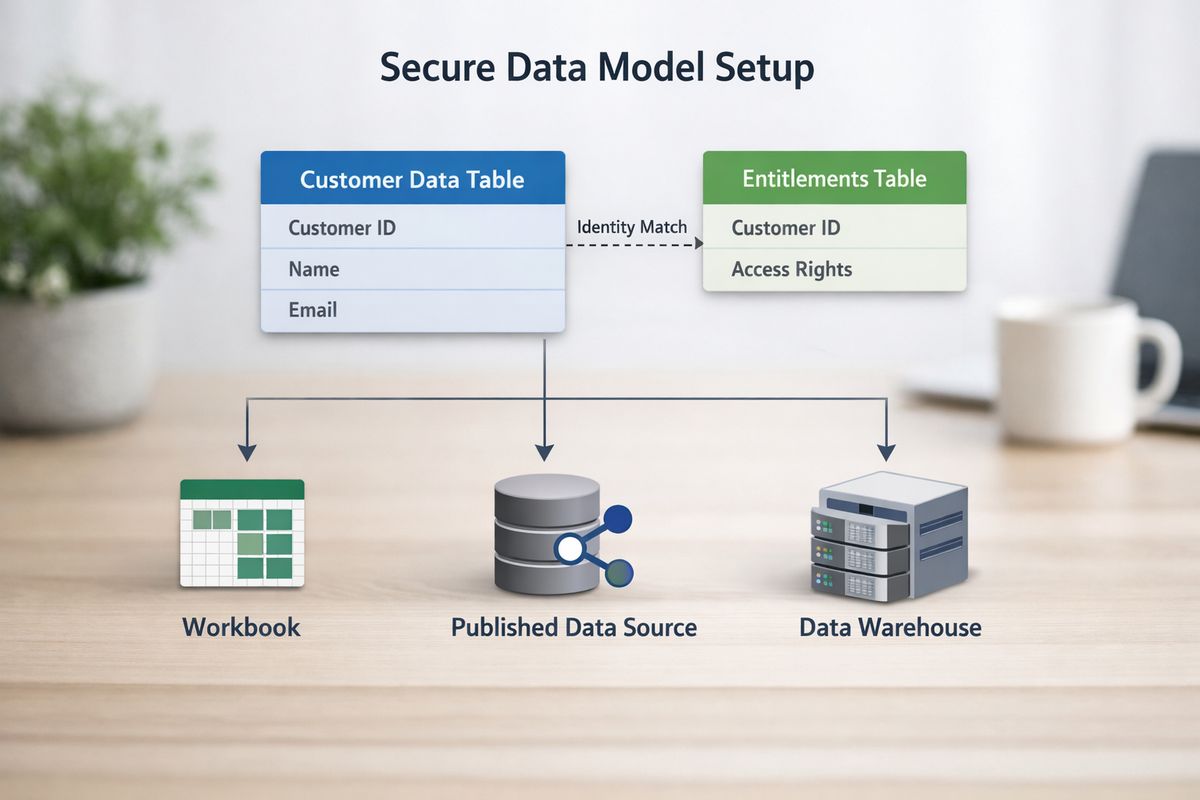
Your entitlements table is the backbone of the whole setup. It maps a user or group to something likecustomer_id, account_id, or region. Tableau guidance and implementation patterns both lean heavily on this model because it scales far better than hardcoding names inside calculations.
Pick your deployment path: workbook, published source, live, or extract
Decide where the rule lives before building it. A workbook-level filter is quick, but harder to govern. A published source is easier to reuse. Live and extract paths also behave differently, especially once security and refresh timing mix together. If you’re comparing this against a broader multi-tenant reporting setup, treat this as an architecture choice first.
Step 1: Choose the right RLS pattern for your Tableau setup
- Review how access is assigned today.
- Match that to the simplest Tableau pattern.
- Avoid mixing patterns unless there is a clear reason.
USERNAME(), ISMEMBEROF(), or database-side RLS.
Use USERNAME() when access is user-specific
Use USERNAME() when each person has a direct mapping to records, like customer-facing analytics where every tenant has its own account slice. This is the most common starting point, and honestly the easiest to reason about later.
USERNAME() returns the signed-in Tableau identity and is commonly paired with an entitlements table in scalable setups, as described in InterWorks’ RLS guide.
Use ISMEMBEROF() when access is role- or team-based
Use ISMEMBEROF() when groups share the same allowed data. Internal sales teams, support pods, and regional managers are good examples. This cuts admin overhead because you maintain group membership instead of editing user-level rules one by one.
Keep RLS in the database when it already exists there
If Snowflake, BigQuery, or Redshift already enforces row access, keep it there. The catch is that Tableau authentication is separate from database authentication, so preserving user context takes planning. Tableau explicitly supports a hybrid security approach, but only when identity flow is clean from end to end.Step 2: Build the entitlement model that Tableau will filter against
https://www.youtube.com/watch?v=t6UsOyY41Xo- Define the row-level key you want to protect.
- Create an entitlements table that maps identity to that key.
- Connect it to your core data model.
Define the lowest level of access
Start at the deepest practical granularity, account, project, site, or region. Too high, and users see more than they should. Too low, and the model gets noisy. The sweet spot is the lowest level that matches your actual permission story.Join or relate the entitlements table to your data
Connect the entitlements table using a relationship or join. Relationships can be cleaner in Tableau’s logical layer, especially when you want to avoid flattening everything. If you do join physically, watch cardinality closely because duplicate matches can inflate counts and totals.Handle “all access” users cleanly
Give admins or support users an explicit path. Add all-access rows, assign an admin group, or create a separate policy. Don’t scatterOR USERNAME() = ... across workbooks. That always looks clever for one afternoon and awful six months later.
Step 3: Create the row-level security logic in Tableau
- Create a calculated field that checks the signed-in identity.
- Apply that logic as a data source filter.
- Publish and reuse the secured source if possible.
Create a user-based calculated field
A common pattern is a boolean calc that comparesUSERNAME() to the mapped identity field in your entitlement model. Tableau is evaluating whether the signed-in user has a valid match for each returned row. Keep the logic narrow and readable.
Apply the logic as a data source filter
Put the rule in a data source filter, not just a worksheet filter. That centralizes the logic and reduces the chance of one dashboard skipping security. Also, avoid extract filters for this job. Tableau practitioners repeatedly warn that extract filters can lock the extract to the developer’s view instead of adapting per user.Prefer published data sources for reuse
Published sources are easier to audit, easier to reuse, and easier to fix once. Tableau conference guidance has increasingly pushed reusable data sources as the way to simplify security and reduce rework. If you’re also evaluating customer-facing Tableau delivery, this is usually the cleanest starting point.
Step 4: Test the setup like something important depends on it
- Create controlled test accounts.
- Validate each expected access scenario.
- Compare totals before and after RLS.
Use Preview as User and controlled test accounts
Use Preview as User where available, but also sign in with named test accounts that have known entitlements. That gives you real output, not admin assumptions.Check no-access, single-access, and multi-access scenarios
Test a user with zero rows, one allowed account, many allowed accounts, and all-access rights. If one of those cases is broken, production will find it for you.Watch for duplicate rows and inflated totals
If totals suddenly double after adding RLS, the problem is usually the data model. A many-to-many join or repeated entitlement rows will create duplicate facts long before the calc is at fault.Step 5: Understand the limits before you scale it
- Review how your source refreshes.
- Count how many workbooks reuse the same logic.
- Audit identity quality before rollout.
Live connections and extracts behave differently
Live queries evaluate against the current source. Extracts materialize data on a schedule. That means freshness, performance, and security testing all change depending on the path you choose.Workbook-level logic does not scale well
Copying the same calc into twenty workbooks creates drift. One tiny change, one forgotten dashboard, and now you’re debugging security by hand. If you’re comparing tools, this is part of the larger embedded analytics tradeoff, not just a Tableau quirk.Identity quality becomes the hidden dependency
Stale groups, mismatched usernames, and missing SSO attributes quietly break access rules. That is an identity hygiene problem, plain and simple.Step 6: Use workarounds to make Tableau RLS more manageable
- Push more context into identity.
- Centralize rules in shared models.
- Move security down-stack when it makes sense.
Pass user attributes from SAML or OIDC
Tableau’s newer User Attribute Function lets identity-provider attributes drive access more directly. That’s useful when usernames alone are not enough and tenant metadata already exists in your auth layer.Centralize security in published sources and governed models
Use shared published sources, standardized entitlement tables, and clear ownership. Governance sounds boring until you need to explain why two dashboards show different customers. Then it becomes the only thing that matters.Push security down to the warehouse when possible
If multiple BI tools sit behind one portal, database-native RLS or secure views can save a lot of duplicated work. That becomes even more useful when Tableau is only one piece of a broader white-label analytics stack.Consider a portal layer when Tableau shouldn’t own the whole access story
Sometimes Tableau should render charts, not carry the entire burden of SSO, JWT-based auth, vendor switching, and tenant logic. In embedded environments, that separation can be the difference between a setup that ships and one that keeps growing sharp edges.Troubleshooting common Tableau RLS issues
Users see too much data
Start with the entitlement table. Look for broad rows, bad joins, weak all-access logic, or the wrong group membership. Rewriting the calculation is usually not the first fix.Users see no data
Check the actual value returned byUSERNAME() or your passed attribute. Identity mismatches, null keys, or missing entitlement rows are the usual cause.